
EtoC
refresh Token 무한로딩 본문
엑세스토큰과 리프레시 토큰을 공부하고 리프레시토큰을 사용한 로그인기능을 만들어보았다.
그런데 어떠한 에러메세지도 없고 포스트맨에서는 무한 로딩이떴다.
2일동안 리프레시토큰발급이안되었던 문제를 적어본다.
하나하나 다 콘솔을 찍어서 찾아보니 @Req @Res 를 지웠을때 로그인이 되는것을 확인하였다.
1번째 문제
import {
  Body,
  Controller,
  Post,
  Get,
  Res,
  Req,
  Request,
  Response,
} from '@nestjs/common';
import { AuthService } from './auth.service';
import * as bcrypt from 'bcrypt';
import * as crypto from 'crypto';
import { AuthGuard } from '@nestjs/passport';
import { User } from 'src/entities/user.entity';
import { IOAuthUser } from './auth-service.interface';

@Post('/login')
  async login(
    @Body('phoneNumber') phoneNumber: string,
    @Body('password') password: string,
    //문제발생지점
    @Req() req: Request,
    @Res() res: Response,
내가 공부했을때 nestjs의 @Req()와 @Res()가 요청과 응답개체를 자동으로 가져온다고해서 위의 코드처럼 전부 nestjs/common에서 가져왔는데
@types/express를 설치하고 거기서 Request와 Response로 불러와야 활용할 수 있다고한다.
Nestjs Docs
Nest provides @Res() and @Response() decorators.
@Res() is simply an alias for @Response(). Both directly expose the underlying native platform response object interface.
When using them, you should also import the typings for the underlying library (e.g., @types/express) to take full advantage.
Note that when you inject either @Res() or @Response() in a method handler, you put Nest into Library-specific mode for that handler, and you become responsible for managing the response.
When doing so, you must issue some kind of response by making a call on the response object (e.g., res.json(...) or res.send(...)), or the HTTP server will hang.
해결: @types/express 설치
npm i @types/expressimport { Request, Response } from "express";service 단에서 원하는 함수를 사용하려하니 없다고떴던 문제점도 같이 해결되었다.
2번째 문제
포스트맨으로 로그인 요청시 accessToken이 리턴되게 해놨는데 상태코드만이 리턴되었다.
원하는 값이 나오도록 코드를 수정하면 에러가 발생..
//controller.ts
import {
Body,
Controller,
Post,
Get,
UnprocessableEntityException,
UseGuards,
Res,
Req,
Request,
Response,
} from '@nestjs/common';
import { AuthService } from './auth.service';
import * as bcrypt from 'bcrypt';
import * as crypto from 'crypto';
import { AuthGuard } from '@nestjs/passport';
import { User } from 'src/entities/user.entity';
import { IOAuthUser } from './auth-service.interface';
import { Request, Response } from 'express';
@Post('/login')
async login(
@Body('phoneNumber') phoneNumber: string,
@Body('password') password: string,
@Req() req: Request,
@Res() res: Response,
) {
// console.log(res);
await this.authService.login({ phoneNumber, password, res });
return { statusCode: 200 };
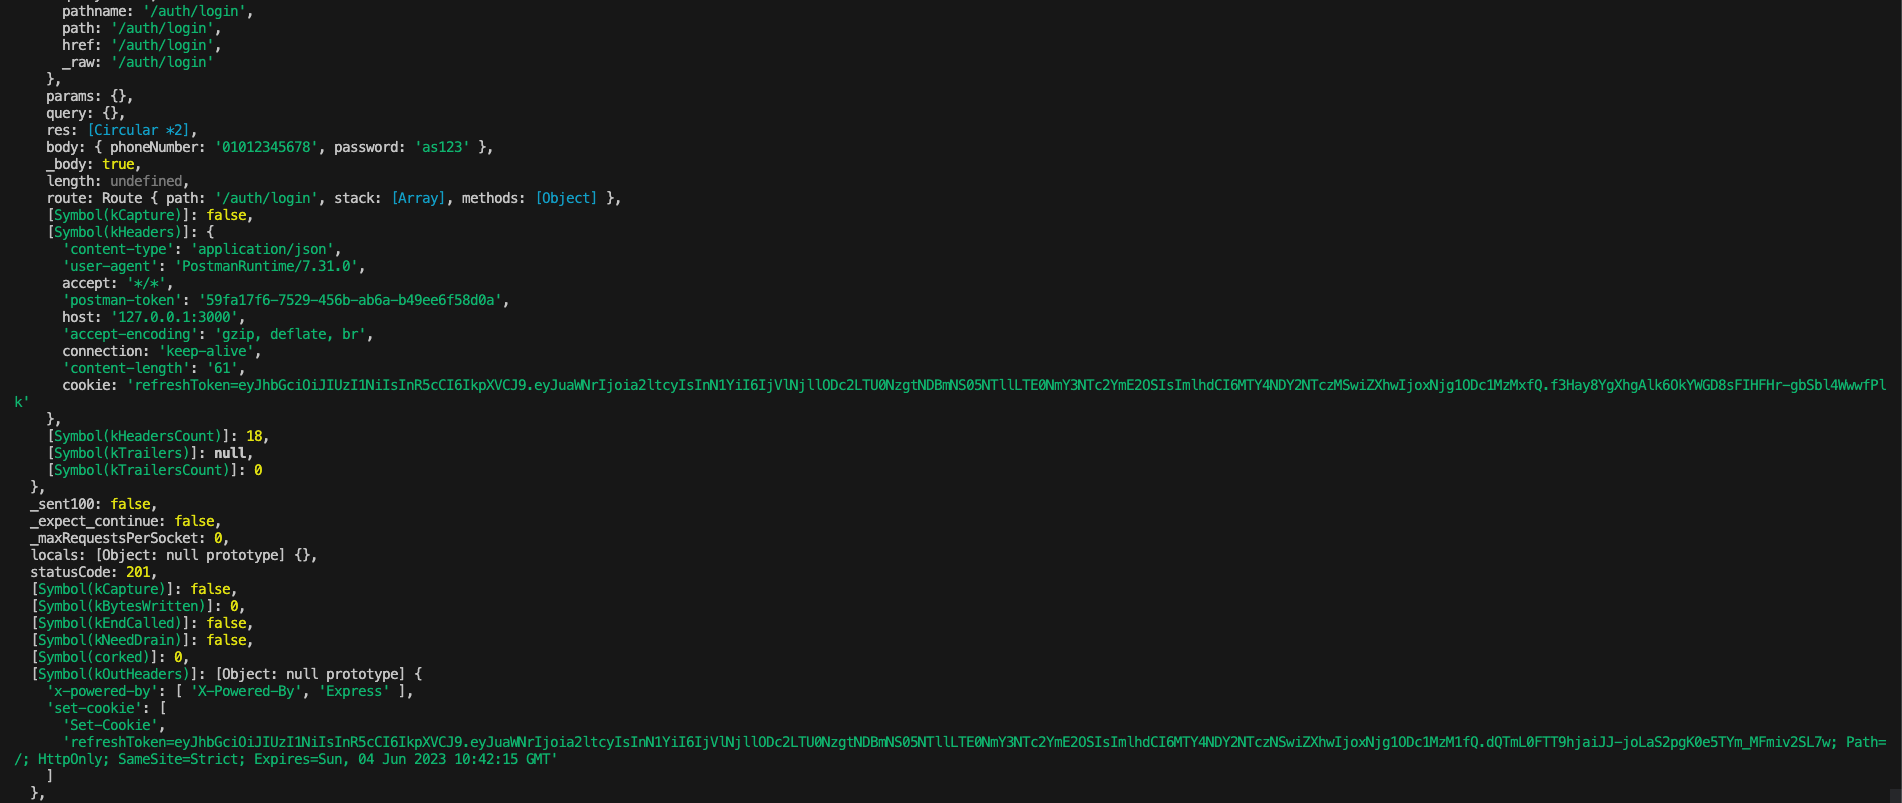
}이것도 에러메세지도 안뜨고 서버는 쌩쌩 잘돌아가서 찾느라 고생했다.
return 을 statusCode로 고정해놓은게 원인인거같아서 찾아보았다.
@Res()와 @Req()는 nestjs 프레임워크가 반환하는값에따라 자동적으로 응답처리를 하는데 내가 리턴 코드를 정해놓아서 수동응답과 자동응답이 충돌이나는것이였다.
해결방법은 @Req와 @Res를 사용하지 않고 위처럼 return 상태코드를 입력하거나
@Req, @Res를 쓰고 res.status(200).json({statusCode:200}) 으로하니 로그인이 가능해졌다.
//service.ts

async login({
    phoneNumber,
    password,
    res,
  }: IAuthServiceLogin): Promise<string> {
    const user = await this.UserRepository.findOne({ where: { phoneNumber } });
   // console.log(user);
    if (!user) throw new UnprocessableEntityException('this email is not used');
    const isAuth = await bcrypt.compare(password, user.password);
    if (!isAuth)
      throw new UnprocessableEntityException('password is different');
    //리프레시토큰 만들어서 쿠키로 보내주기, body리턴될때 알아서 따라감
    this.setRefreshToken({ user, res });

    //번호와 비번 일치시 엑세스토큰 브라우저에 전달
    //return은 body에 담아서 보내주는것이다.
    return this.getAccessToken({ user });
  }

  setRefreshToken({ user, res }: IAuthServiceSetRefreshToken): void {
    if (!res) {
      throw new Error('Response object is undefined or null');
    }
    const refreshToken = this.jwtService.sign(
      { nick: user.nick, sub: user.id },
      { secret: process.env.REFRESH_KEY, expiresIn: '2w' },
    );
    res.setHeader(
      'Set-Cookie',
      `refreshToken=${refreshToken}; Path=/; HttpOnly; SameSite=Strict; Expires=${this.getExpirationDate()}`,
    );
  }

  private getExpirationDate(): string {
    const expiresIn = 14 * 24 * 60 * 60 * 1000;
    const expirationDate = new Date(Date.now() + expiresIn).toUTCString();
    return expirationDate;
  }

//엑세스토큰: 잘 받아옴
  getAccessToken({ user }: IAuthServiceGetAccessToken): string {
    return this.jwtService.sign(
      { nick: user.nick, sub: user.id },
      { secret: process.env.JWT_SECRET, expiresIn: '30m' },
    );
  }
console.log(user) 결과값

이제 잘 받아온다.
혼자 하나씩 해나갈때마다 뿌듯한데 너무 좀 더 빠르게 할 수 있었으면 좋겠다


